Welcome to Therian Saga!
Once you’ve created your character (and take care in your
choices as it costs Blue Crowns to change anything later) you arrive at Hope
Island.
You’ve now got your trade chosen and your extra land
skill.
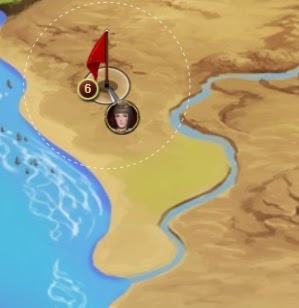
The first screen you should see will have the entirety of Hope
Island
and a window in the top left with a quirky looking guy who has a yellow
exclamation mark above his head. Just click on him and follow along.
Notice the difference between the thought bubbles (which
simply give information) and the exclamation points (showing
quests). Take the first job, and you’ll see, by helping to empty
the hold you’ll get 50 bronze coins, some leather gloves and a staff (your
first weapon!)
Click on the “Empty the ship’s hold” button. Once the
job is done collect your goodies. Pull open the character and bag tab on
the right side of the screen and double click the gloves and staff to equip
them. Work at the docks to get an extra few coins. This option is
only available periodically.
Once you’ve equipped your staff and gloves, and worked on
the docks, click on the second tab to obtain another quest.
First click on the guard with the exclamation mark. Click on
“The ranger’s camp” and accept the quest.
As you can see, the quest requires some Rhumbular. If you look at the lady beside the guard you’ll
see she has a shop icon above her head in the form of beer – this means she has
something to sell, so click on her next.
She has a few things to sell here, all useful to start with,
but you can do without for now as well.
The one thing you do need is the Rhumbular. Buy a Rhumbular from her, then click on the
guard again and finish the quest. This
will reveal a new location: The Ranger’s Camp.
Click on the Ranger’s Camp, choose Travel to Rangers’ Camp
from the screen on the left, and a new window will pop up asking you if you
want to travel towards that location – click accept and you’ll be on your way!
Once at the Ranger’s Camp, you’ll see a guard with an
exclamation point. Click on her and
choose Learning Exploration.
Accept the quest
This will open up the option to Learn to Explore. Click on the Learn to Explore button to train
exploration.
Click on Finish when the task is complete.
Finishing this quest gives you a quest reward of a
torch. If you equip your torch it adds a
bonus to your exploration skill. I would recommend clicking on the “Study
Exploration” button and to train it as much as possible. (should take less than
a minute to train to the maximum allowed here)
Click on the guard’s next quest, From Theory to Pratice.
Accept the quest
You’ll notice a little number 1 on your screen, that’s where
you are supposed to go to explore.
Click in that general area and travel to the location.
Click on Explore Fairies’ wood
You should discover a location that appears with a question
mark
Click on the location and choose to Travel to Rusilac
Plateau
There you will meet Ale.
He’s a good guy. Click on his quest A first Companion and choose accept. You now have Ale in your party! Your very
first companion. Pat yourself on the
back, do the snoopy happy dance, take a bow – however you choose to celebrate.
Now if you hover over Ale, you’ll see his stats.
He’s a fighter, and he can explore. That’s pretty handy. He’s going to hang out with you while you
check out this cave. Unlike most other
companions, Ale will leave you at the of this dungeon quest – if you find
yourself growing attached to him, fret not, you can get him back much much
later in the game.
So now that you’ve bonded with Ale, click on Enter the
Rusilac Plateau. This is your first
dungeon.
Kinda funky right? Just click on the arrows to move around.
There will be different things to do in here depending on
your chosen skills in the beginning screens and what you happen to have on you
for clothing etc. The point is to get to the watery part at the end of the
dungeon – so make your way there when you are done exploring everything else.
If you find you can’t pink up the loot at the
crossroads – its because your skills aren't high enough.
See when you click on Search the Debris, a new screen pops
up and there is a red zero in the top left corner. If you hover over that number it will tell
you the skill required and the skill you have.
As you can see here, the task required 0 exploration, and I have 3.2
exploration – so that’s not the problem.
But, the task requires 3 cave and I only have 2.5 cave, so I can’t
complete the task.
Ok moving on to the lake area…
When you arrive at the lake area, you will face your first
opponent. No worries, Ale will fight
with you too. There are two ways you can initiate the fight. You can either click on the snake and click
attack, or drag and drop your party into the circles beside your enemy.
Click confirm when you are set up.
It’ll take a few shots, but once you kill the snake a
message will appear that you have finished the quest.
Ale will want to talk to you now and part company. Click on
him, then Finish the quest A First Companion
Click on Pick a Russula, and wave a fond farewell to Ale.
Now click on Exit the cave
You’ll notice The Rangers Camp now has a yellow question
mark on it – that means there is a completed quest to finish at that location,
so head on over.
Click on the guard when you get back to the Rangers Camp,
choose From Theory to Practice and finish the quest.
A new quest appears in the second tab.
Click on the tab, click on the herbalist and accept Getting the Potion
Click on Rusalianar Potion to create the potion
Finish the quest
Choose the quest Find the Captain of the Guard and Finish it.
A tower will appear with a Yellow Question mark. Head over to it
Once you are at the tower, speak to the captain ,click on the
quest “The watchtower”, then finish it.
Choose Leave
Hope Island,
and finish that as well.
A new spot will appear
Click on it and choose “Travel to Nations Pier”
At the Nations Pier, speak to the falconer and choose
Nations’ Pier quest. (You can read all
of the other stuff there too – some basic information it doesn’t hurt to know)
When you are ready, click finish to get your 5 silver coins and
open the way to the mainland which is where the game actually begins. Wave goodbye to Hope Island,
you will not be returning.
Click on Travel to Hawkoria and Begin your journey!
Happy Hunting!
 #1 - City of Hawkoria, 1st tab in the visitors district. Invite Gumbar Longstride. (The option appears in the left panel)